
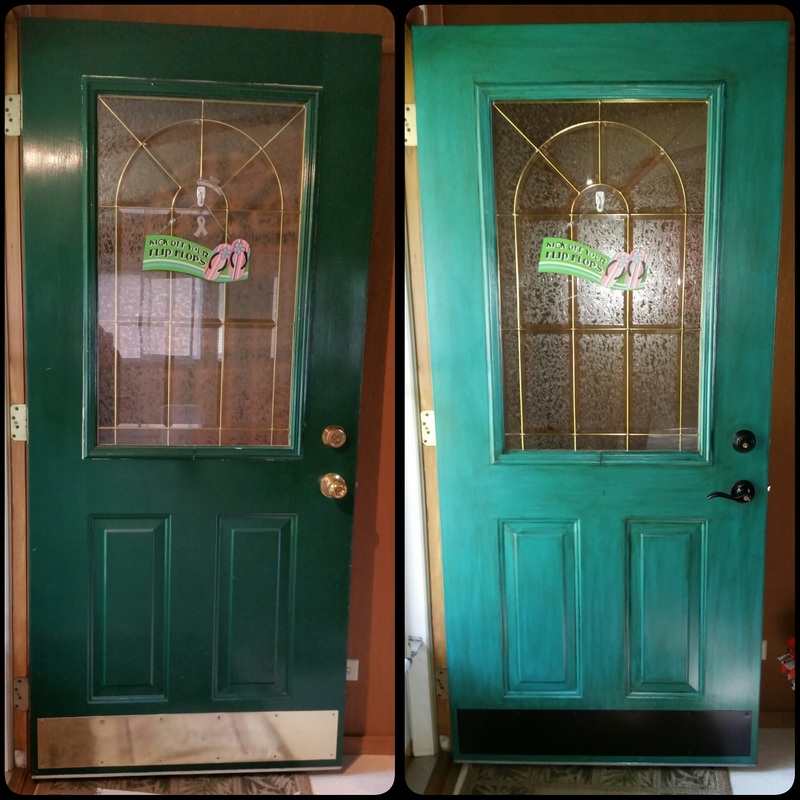
Hello again lovely people! I am back to write on a much more exciting topic than a tonsillectomy: My step-by-step, DIY remodel of my front door! I have had many people asking how I did it, or if I'll come do theirs next so I figured a blog post was in order. After scouring Pinterest for tips and hints on the best way to repaint a steel entry door, I decided to just jump in. I knew I wanted to do a bright turquoise and antique it to look more rustic. I decided on Nifty Turquoise for the color, and used a Mocha tinted glaze. So go ahead and click "read more" to join me on my journey! I have included all of my pictures in the gallery at the end :)
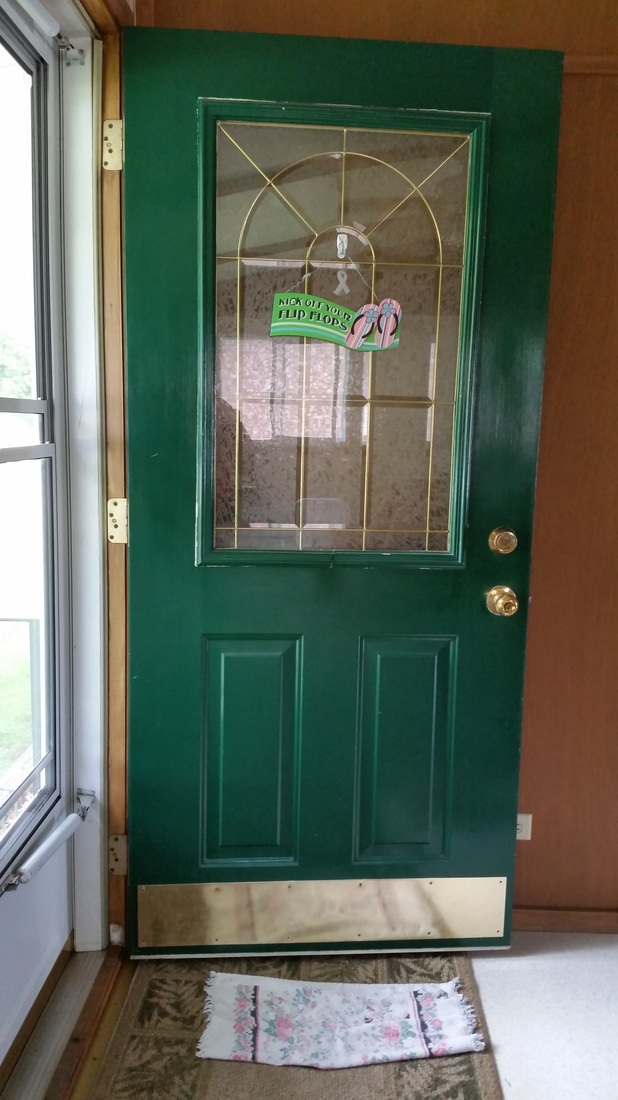
First things first, here is a before picture of the door... With a color I like to call- Unwelcoming Forest Green. Bleh. and hardware that didn't really work, let alone make you want to come inside.
Tools:
- 1 sheet Sandpaper (fine grit)
- 1 qt. Oil-based Metal Primer- Gray
- 1 qt. Exterior Latex Paint- Sherwin Williams Nifty Turquoise (SW 6941)
- 1 qt. Rustoleum Transformations Decorative Glaze- Java Brown
- 1 Spray Can Rustoleum Metallic Paint and Primer- Oil Rubbed Bronze
- Chisel
- Painters Tape
- (Optional) Putty to fill in cracks/dents- make sure it is outdoor!
- Paint brush- 1 inch (and 3 inch if you want), also smaller (1/8 in) brush for trim
- Small Paint Roller/Roller Cover- 3 or 4 inch basic roller
- Foam Paint Brush (for Oil-Based Paint)
- Screwdriver/Drill
- Cardboard, Egg Carton, or something to hold your kick plate screws
 |  |  |
Step 1: Remove the Hardware (Handle, Deadbolt, and Kick Plate), and then remove the door from the hinges. I set my door on our table so I could stand and also see better with the light above it.
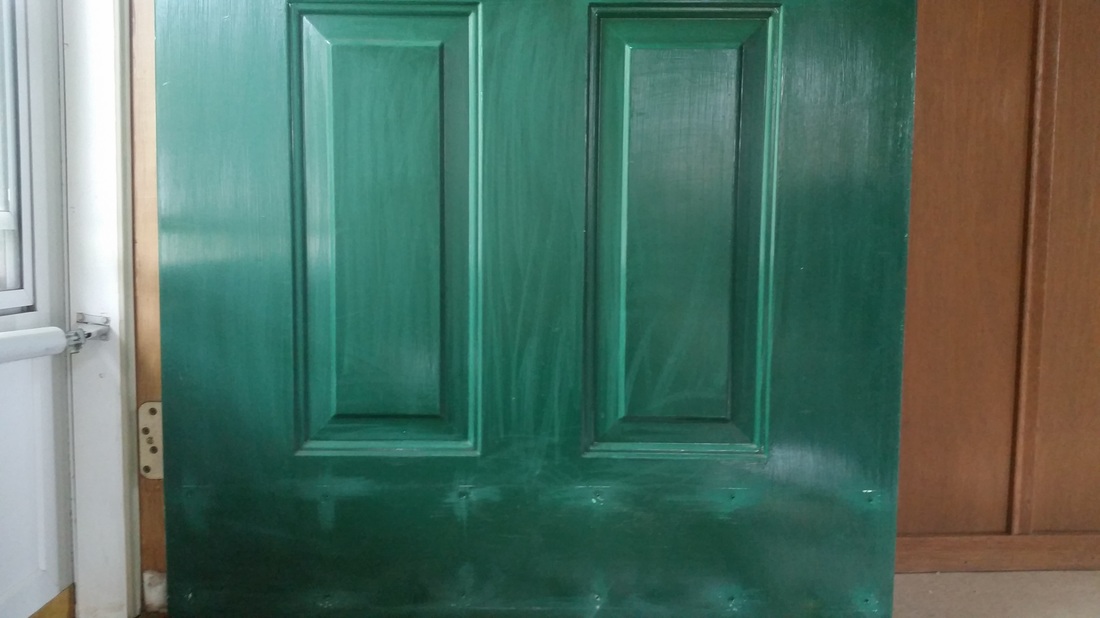
Step 2: Sand down the door, making sure to remove all bumps and lines from the previous paint job. I just used a piece of sandpaper, but you could use a sander to make it a little less manual as well. ***Make sure to pay extra attention to under the kick plate and sand off any rust spots***
Below is an image of what the bottom portion of the door looked like after sanding. (I kept mine on the hinges for this part because I waited for Ben to come home and help me with that part)
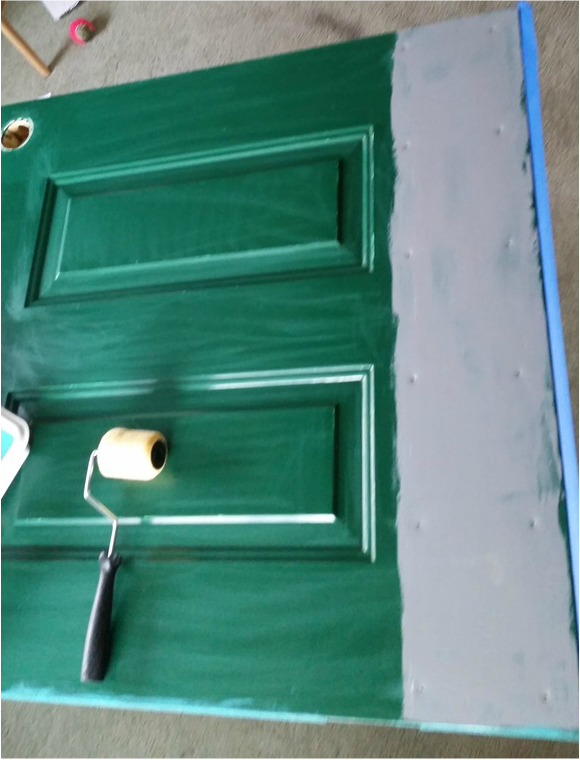
Step 3: Prime It!
A tip I learned from my helper at the hardware store that is very important: Don't paint oil-based paint over latex paint or it will crack. I wasn't sure what the paint was on the door, so I did a scientific test of nail polish on a cotton ball and it rubbed off green paint so that told me it must be latex. (The true version of this test is to use rubbing alcohol, and if it doesn't rub off it is oil-based, but if it does it is latex paint.) The door was rust free from what I saw, but I wanted to make sure the kick plate didn't rust. So I only used the oil-based paint under the kick plate area, and made sure to sand it extra-carefully to prevent cracking after application. I made sure the layer of oil-based paint was covering the majority of the green paint, as well as all of the holes from the screws. I also put oil based paint on the rubber door seal afterwards because there was green paint on it from previously.
***I recommend using the foam brush so you can just throw it away after this step***
Step 4: Tape off non-painted portions. I went with what was painted already, so I taped off the sides of the door and the window. I recommend putting thicker width painters tape on the window, or doubling up two smaller widths so you can avoid getting paint on the window. If you need to apply putty, do this now and make sure it dries before painting over it.
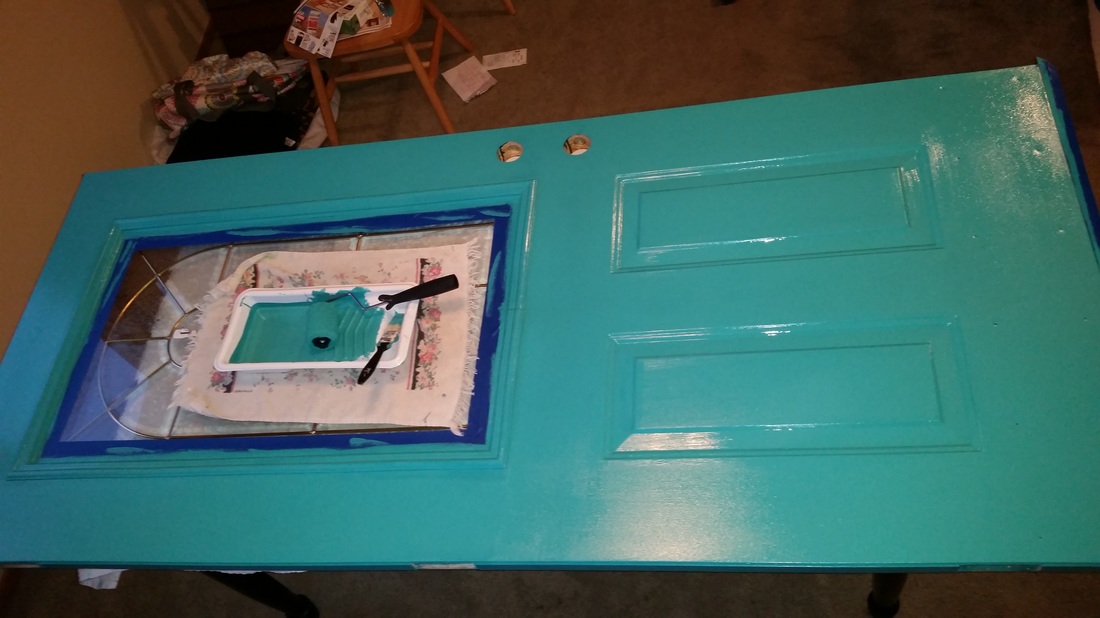
Step 5: Start Painting!
I had a small paint pan that I set in the window on top of towels, and it worked great for accessing all the way around the table! I started by using the paintbrush and going around all of the edges. I then used the roller to apply it to the rest of the door. While that layer dried, I went back and painted the window trim again and the edges of the door. I continued this process until it was fully painted, and allowed time to dry enough in between.
I left the door overnight to dry, and because of the heat it was still a little tacky the next day so we put a fan on it and let it dry another day.
(The picture below is after paint, before glaze)
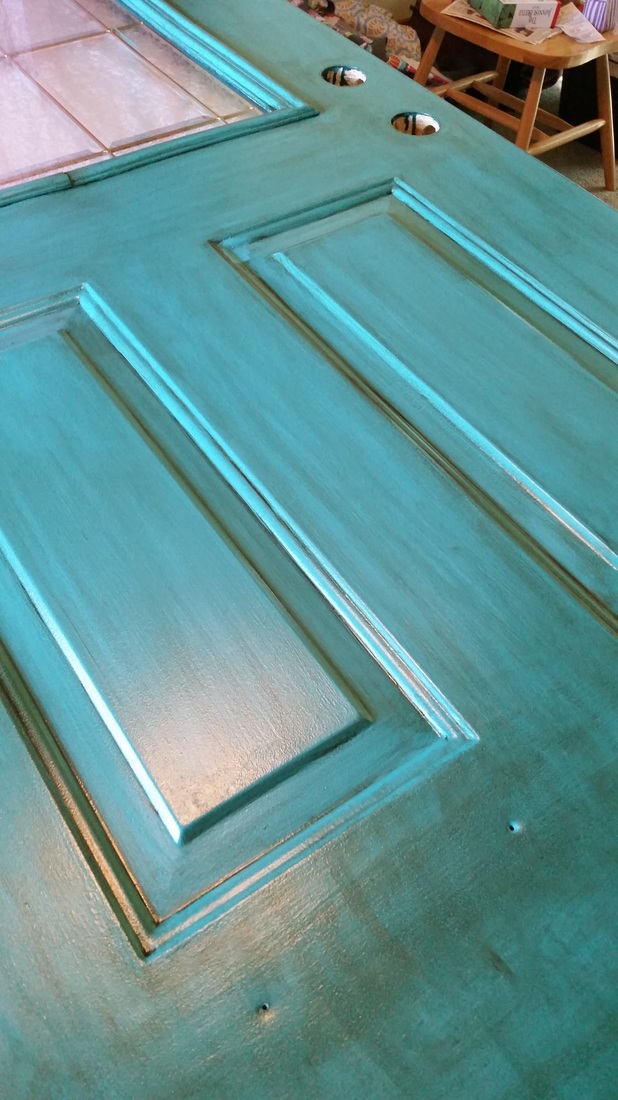
Step 6: Antique/Glaze!
Now the fun part! I have never glazed anything before this project, so it was a trial and error experience for me. I started with a waxed cheesecloth, and didn't like the way that spread the glaze so I ended up just using an old face towel. The main thing is to make sure the towel is lint-free.
I started on the edges that I had painted so if I made a major mistake it wouldn't be noticeable. To start, point your finger and use the towel just like that. I found that putting a generous amount of glaze on that small spot and then wiping it off on the edge of the can gave me the best coverage. The trick that I learned was apply a generous amount (without creating puddles) and then wipe it back off lightly to give the antiqued look.
I did all of the edges of the door first, and then moved on to the rectangle spots at the bottom of the door. I then measured the width of the new door handle and deadbolt and added an extra glaze around where the edges would be. After that, I glazed the remainder of the door and then finished by focusing on the edges on the front of the door (around the window and around the rectangles). For the trim/edges, I used a small paint brush (roughly 1/8 in) to reach into the creases and make them darker. I continued to use the towel to apply and then wipe of the excess glaze to create the look I wanted. This was the most time consuming part of the process for me, but I was very tedious in the edging parts. I then let the door dry over night (with the fan blowing on it).
Step 7: Kick plate!
I was so excited for this small part of the project, because I couldn't wait to see the updated kick plate on the door. I took a cereal box and set the kick plate on it and sprayed a layer of paint onto it. I let that dry and added two more layers and then brought it inside to dry a little more. In the meantime, I put all of the screws into a small piece of cardboard (though an egg carton would work too) and sprayed the tops of them to match the kick plate.
I was so excited for this small part of the project, because I couldn't wait to see the updated kick plate on the door. I took a cereal box and set the kick plate on it and sprayed a layer of paint onto it. I let that dry and added two more layers and then brought it inside to dry a little more. In the meantime, I put all of the screws into a small piece of cardboard (though an egg carton would work too) and sprayed the tops of them to match the kick plate.
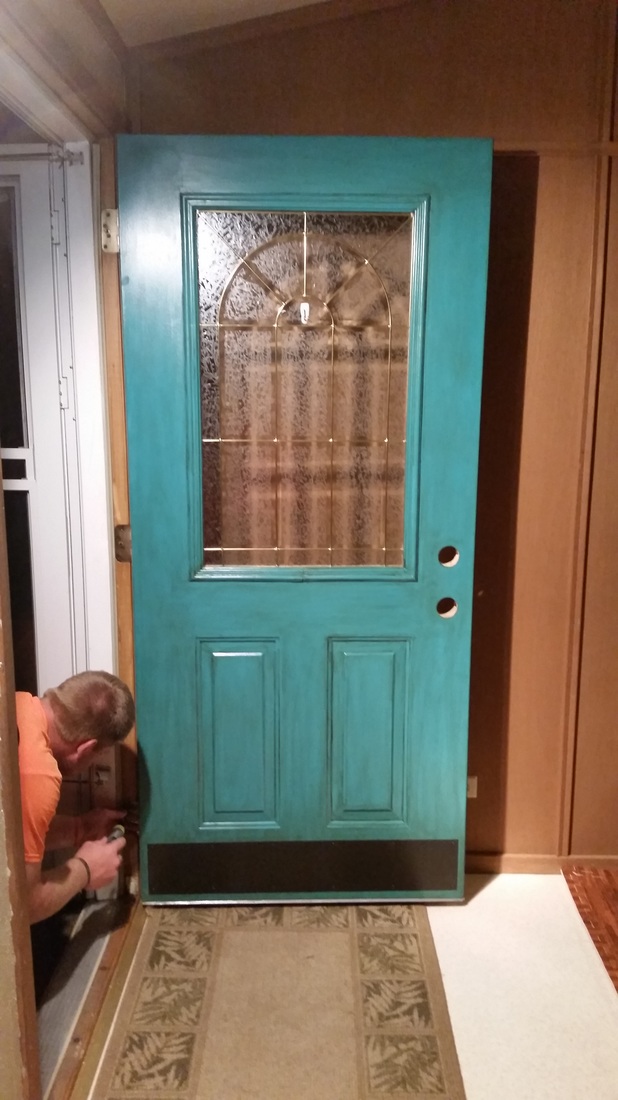
Step 8: Reassemble
After everything dried, we screwed the kick plate onto the door, put it back on the hinges, and installed the new hardware.
After everything dried, we screwed the kick plate onto the door, put it back on the hinges, and installed the new hardware.
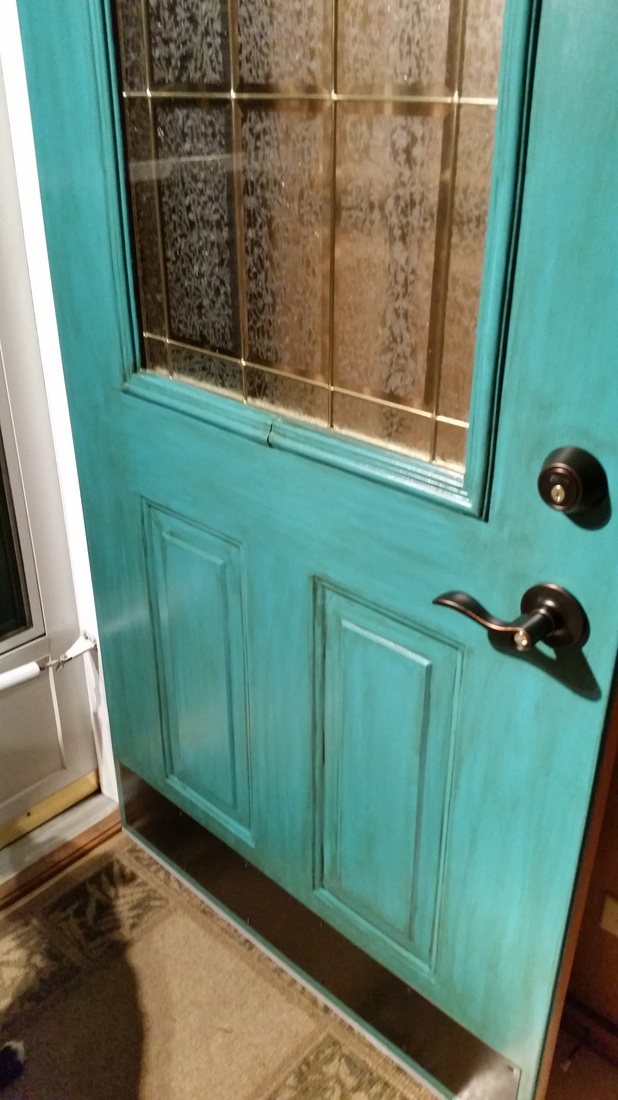
And voila! A beautiful new front door that I can't take my eyes off of!
If you have any questions, feel free to send them my way!
If you remodel your own door, I would love to see your pictures, so send them over!
If you have any questions, feel free to send them my way!
If you remodel your own door, I would love to see your pictures, so send them over!
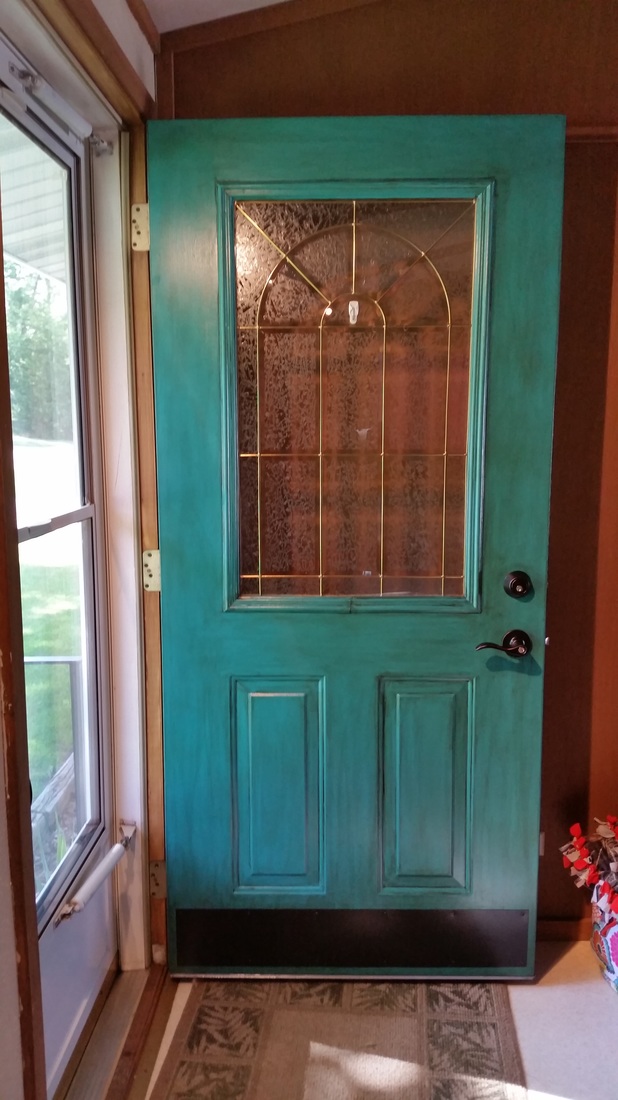
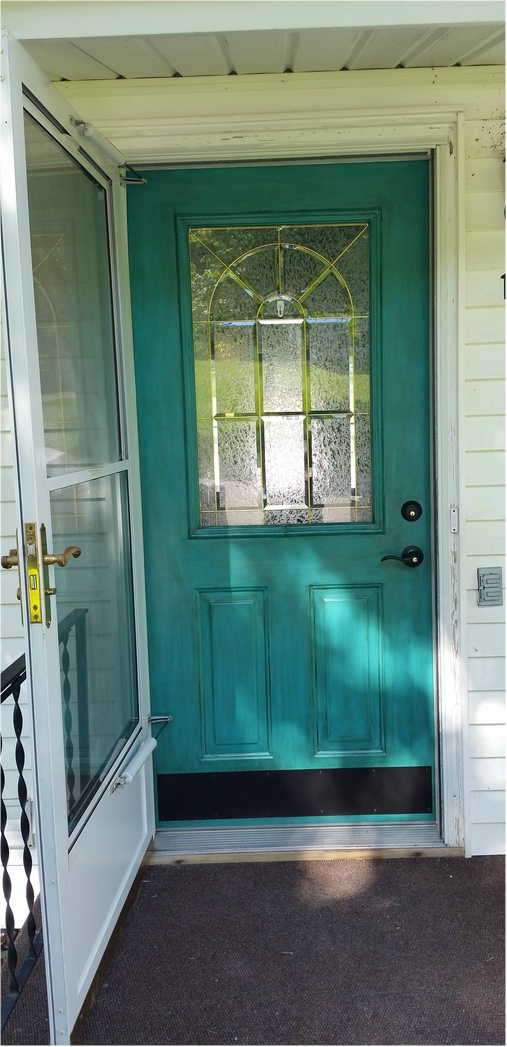
Below are the pictures in this post, plus some extras. Enjoy!


